Translate

Showing posts with label digital effects. Show all posts

Saturday, March 12, 2011

Run For Cover - I'm Experimenting Again!!!

Wrapping my brain around Photoshop and Gimp is not easy. I'm slowly learning to touch up my photos, but the major things still elude me. Learning about the "overlay" setting for a layer was reason enough for a celebration to me. In fact, I'm still a bit giddy about that one. Anyway, I've done lots of experimenting lately and thought I would share some before and after images. The unfortunate part of all this experimenting is that when I do achieve something fun, I can't remember how I did it. *sigh*

Here is an attempt at HDR. 

Light unedited image
Dark unedited image


Created in LuminanceHDR and tweaked in PS/Gimp
Edited in Photoshop/Gimp

I'm not entirely satisfied with the results so far, but with a bit more tweaking perhaps.  These small sized images are difficult to really show the result, but I like the image achieved in Photoshop better than the HDR version but neither has a sky that works yet.  And the trees and grass in the HDR version are oversaturated.  Eh...I'll keep working on it.

I've also tried my hand at using texture layers to make photos look old and worn.  I know there are many effects that artists are going for with the use of textures, but I've been looking at old family photos lately and wanted to mimic that look.

Original image
Faded and texture added


Original image
Faded and texture added


 The resulting images in my experiments with textures look exactly like the old photos I was attempting to mimic.  Not sure if anyone would find them artistically pleasing, but it was fun.  I did post the faded rose on my Tumblr and it got lots of likes and reblogs so I guess there may be a niche for that type of work.
My brain may be too full already or perhaps just getting too soft, but it's been an uphill battle learning to do this stuff.  Hopefully it will all get in there soon.

The cool thing about art is that there is no right or wrong.  There are guidelines and accepted practices, and there are opinions, likes, and dislikes, but if the artist likes it, it's right.  There is always room for improvement, of course, and adjustments that can be made to make one's work a bit more likely to find an approving eye elsewhere, but if it achieves the artists intent or makes the artist happy, it's a success on a basic level.  It's worth the effort for me to continue trying to learn Photoshop and Gimp as well as working on improving the artistic value of my work, because I hope to create images that add something positive to other people's lives.  I would love to hear your thoughts.

Thursday, August 19, 2010

Tilt-Shift Fun

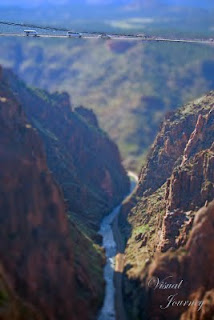
Lately I've been working on a photo style that is fairly new to me.  It is called Tilt Shift.  It uses either a special lens or processing techniques that produce a miniaturized photo of a real-life scene.  I love miniatures and model train lay-outs, so this photo style is proving to be great fun.

I'll give a brief guide for achieving the Tilt Shift effect for anyone who may be interested in creating their own Lilliput.

1.  Choose a photo with lots of depth.  A high vantage point works best but the technique can work on many other shots as long as there is sufficient depth to the scene.

2.  Sharpen the image more than you would for a normal photo.  Adjust contrast, color, brightness...

3.  Using your selection tool of choice, select the main focal point for your scene.  Then click "invert" on the selection menu.  This allows you to only perform the next step on the rest of the photo instead of your main focal point.

4.  Choose a blur filter such as Gaussian Blur.  Gently blur everything around your main focal point.

5. Invert the selection back.  Now expand the area being selected, moving only a bit at a time away from the main area.  Be sure to keep the focal plane in mind so that equal blur is applied to areas that are an equal distance from the camera.

6.  Invert again and apply a bit more blur this time.

7.  Continue this process of expanding the selection area and increasing the blur until the desired level of blur has been achieved to give the photo the look of a miniature scene.

8.  If necessary, go back and selectively blur out any visible lines where the change in the amount of blur is too agressive.

9.  Over-saturate the colors to give it a painted model look.

Here are a few of my before and after photos.  You can definitely see the learning curve as I worked at figuring out the technique, although I don't have them posted in the order in which they were processed because I'm barely competent with this text editor. :/  If you decide to give Tilt Shift a try and you post the resulting photos somewhere, please let me know.  I would love to see your work.